
How To Build A Gallery Wall In Your Home - A Tutorial
Gallery walls certainly aren't a new trend in home design. For the past several years, we've been seeing designers and homeowners alike grouping together artwork to create a visual collage of images that read like a single piece of art. They almost give the illusion of wallpaper allowing you to 'plaster' your walls with eye candy higher and wider than a piece of art can reach.

Gorgeous Gallery Wall
(image via)
Personally, I love the look of a gallery wall (especially the gorgeous one above). It's an opportunity to display a wide range of art you've collected all at a single glance. It's a way of filling a large space that might otherwise be difficult and expensive to do so with a single substantial piece. It also feels more flexible - artwork can be simply swapped out of frames while keeping the layout of the install intact.
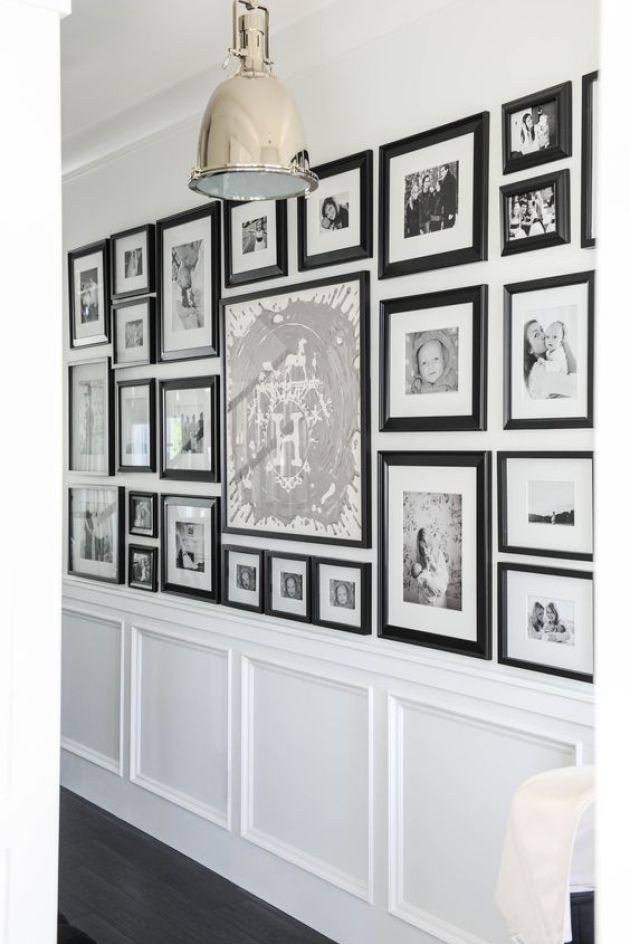
There are so many directions to choose from when laying out your gallery wall. A high contrast combination of black frames with white mats laid out in a streamlined and linear fashion creates a tailored, modern and minimalist look.
Modern Gallery Wall
(image via)
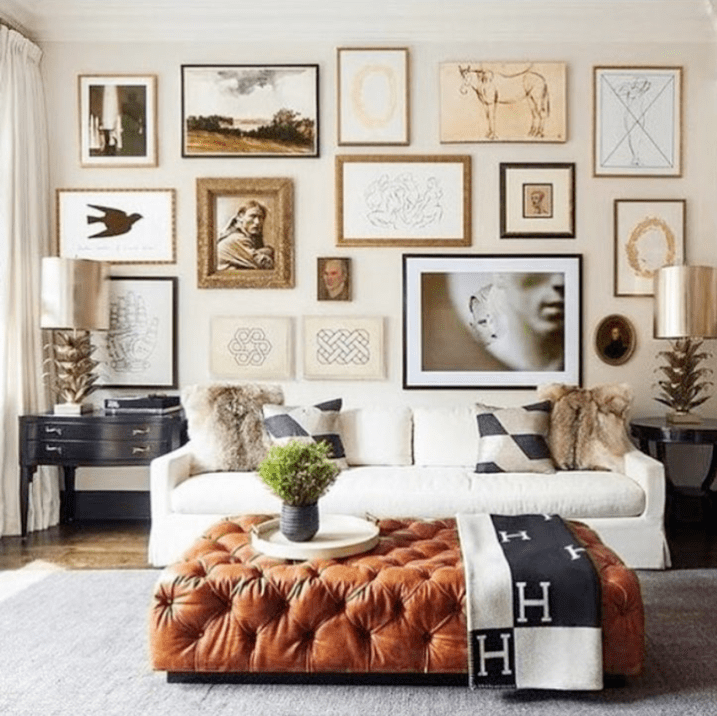
A more eclectic look is created by mixing frame finishes and mat colors.
Eclectic Gallery Wall
(image via)
Will you only use black and white images? Will you mix and match photography with watercolors? Will you layer scenery with portraits? There are no hard and fast rules of what you should do, but it's nice to have a vision in mind of the overall look and feel you are going for in the room to help guide you in your selection of artwork, photos and finishes.
I'm sharing with you today a gallery wall I created in my own home. I have long been a fan of the stairway gallery - a collection of photos to be enjoyed while cascading up to bed. I knew off the bat that this would be a collection of family photos and being that the majority of our family photos have been shot in color, I also decided they would all be color images. I have used the same photographer to shoot our family photos since my first daughter was born nearly 9 years ago. I chose her first because of her incredible talent and second, because she's a close personal friend. The bonus is that the images she's captured, while spanning over 9 years, all possess a similar quality and style that read seamlessly as your eye scans from one image to the next.
I started with the idea that I would use all gold frames. Gold and brass touches repeat themselves throughout our home and I thought this could be an impactful way of carrying the theme from our first level to our second.

Gold Accents

Gold Accents

Gold Accents
My personal style definitely lends itself a little more feminine and I like to think it has a bit of french influence. When I came across these gilded gold frames at Homegoods, I knew they were the perfect jumping off point.

Gold Frame
Admittedly, the frames are pretty ornate and I wasn't so sure grouping a large number of them together would make them any less so. So while they remained the foundational frame in the collection, I layered in 3 other gold profiles to break things up. The frames range in size holding photos in 4x6, 5x7 and 8x10 dimensions. The frames, themselves, however, are slightly larger and differ in size depending on which frame profile you are measuring.
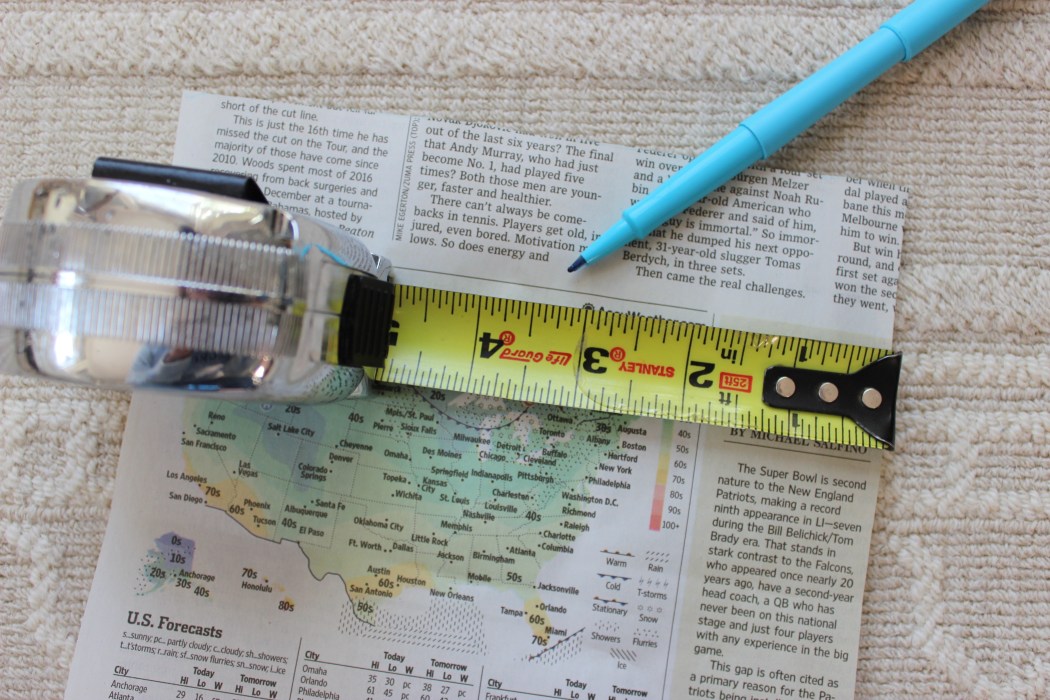
After I had purchased all of my frames, I got to work on laying them out. Start by tracing each of your frames on to a template. I use newspaper and simply set the frame on the paper, carefully trace around the edge and cut it out as accurately as possible. The more precise you are with your templates, the more time and headache you will save yourself when it comes to drilling holes. Be sure to label each template so you know which frame it coordinates with.
Once you have all of your templates prepared, it's time to start laying them out. In my case, I chose to do this directly on the wall. I started by establishing an 'edge' - an invisible line that would act as a guide for my layout. It would progress up the stairs equidistant from the stair skirt trim that runs along the bottom edge of the wall. The lowest frame in the gallery would always sit with a corner on this invisible edge allowing the frames to rise at the same progression as the stairs. Once I established the height I wanted this line to fall at, I measured out several points on the wall and created a tape line to act as my guide.

Start of a Gallery Wall
From there, it's a matter of fiddling around with your templates. It helps to mark a few reference points on your tape line - where 'center' falls, how much you want your frames 'indented' from the outer edge, etc. In my case, I was going for an evenly spaced, balanced and somewhat symmetrical design - or perfectly imperfect as I like to call it. I started by laying out my center frames and building the design outward. I was cognizant of how often I was repeating a particular frame profile and being sure my larger frames were spaced somewhat evenly throughout.

Using painters tape to tape your templates up is easy on your walls and easy to move over and over (and over) again. Take breaks and come back to it as needed. Depending on the quantity of pieces you are trying to include, the process can get tedious.
Once you are happy with your design, it's time to start hanging each frame. The objective here is to avoid having your wall look like target shooting practice recently took place. I started with the frame at the bottom of the stairs because it sat closest to a fixed object, a cased opening.

Gold Frame
By starting here, I give my design a little room to breathe, if my templates start getting nudged a quarter to half-inch to the right, no problem, there's plenty of wall space at the top of the stairs. Start with a frame that has less room to sacrifice and move in the direction where there's room to make adjustments as needed.
Take the frame that correlates with your first template and measure out the distance from the outer edge of the frame to the center of the hanging hardware and from the top of the frame down to the same center point establishing where your nail will go.
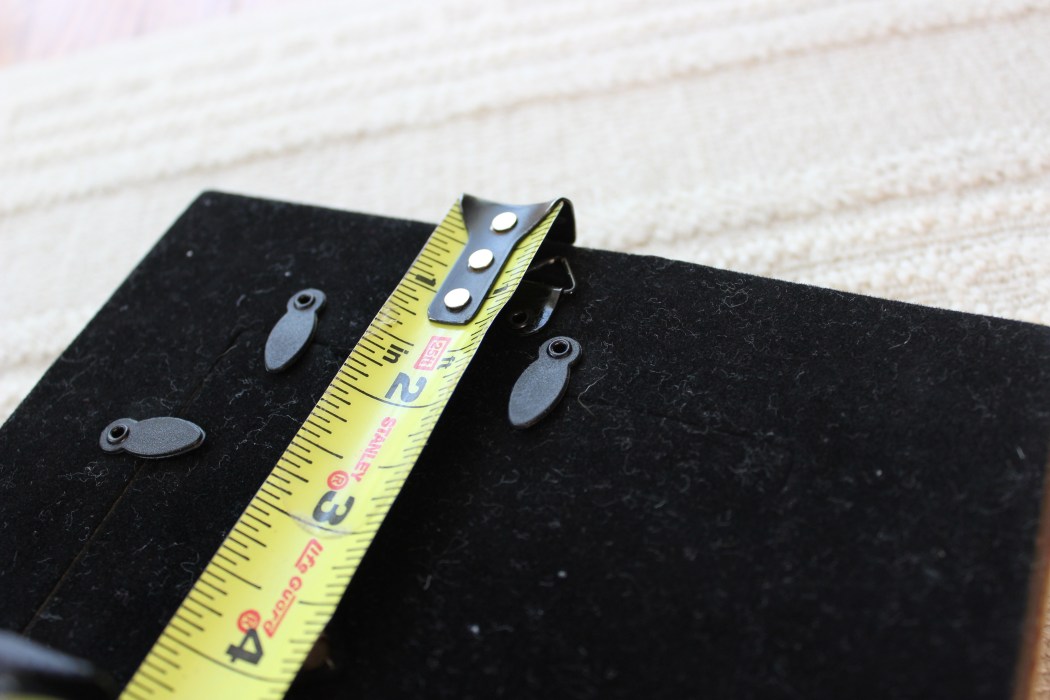
Once you have those two dimensions, measure the same points on your template: from the side to the center and from the top down to the center hanging point. Mark on your template where this point falls being as accurate as you can.
Next, drill your hole (or pound in your nail) straight through your template on the designated spot. Now you can pull down your template and replace it with your first frame.

Gallery Wall
When you initially laid out your templates, you were aware of how you wanted your frames spaced. I like to create a physical template to act as a spacer. This way once I have a frame hung, it's easy to insure my spacing stays on track by simply setting my spacer on the top edge of my frame and shifting the templates above it to accommodate the correct spacing. The same can be done for the frames to the side.

Gallery Wall Spacer
Another note when it comes to accuracy is to be sure when measuring the hanging point on each frame, you accommodate for the weight of hanging them. If you have a wire back frame, hook your measuring tape on the wire and measure the distance from the top of the frame down while the tape measure supports the weight. Your measurement will be much more accurate once the frame is installed.
Here was the finished product I was left with once I had mine installed.

Gallery Wall

Gallery Wall

Gallery Wall


I tend to be a bit of a perfectionist so it was in my nature to create an installment that focused on tight, even spacing and a melody to the rhyme and reason of each frame profile and its orientation. I love making my way up to bed at night and taking each step at a time, reliving the memories of these fleeting days. Once a year, I swap out a few images to keep things fresh and current.
I would be remiss not to mention that another totally acceptable way of hanging a gallery wall is to just eye it up and go for it! Keep in mind the way one piece lends itself to the next and whether you want your wall to read as one overall piece, or each piece standing on its own. The possibilities are endless!
Now what to hang on your beautiful gallery wall. I'll be back tomorrow with a MAJOR shortcut when it comes to selecting artwork. Stay tuned!